Winner Winner!

Saturday, December 29, 2018
Hey Everyone,

I am sorry I didn't pop on on Thursday with the thread winner. My husband is out of town so I always get behind the eight ball when that happens. Let's give this box away. Signature Cotton Quilting Thread.


I used Random number generator to pick the winner.

Number 50 is:

I like to use grey, it's neutral & so nice a color too! Thank you, Susan

You will be hearing from me in a moment, Susan! 

And everyone else... you will be hearing from me this week sometime too :)

Love,

A little something extra for Christmas

Sunday, December 23, 2018
Hey Everyone,

I made one more set of stickers for you. I am on a mission to use up what I have. So in that spirit I decided to re-purpose the unused weeks in my 2018 planner, because I was a sporadic planner and I have a million planners that I like to switch back and forth in.

I made this page of stickers to cover the one or two things that I put on my dailies and cover the month on the top left of the page. Then I use the day covers to change the days (you can find those in the December Download) and dates. I made two sets of numbers so you can change your monthly page too if you want to. I wasn't planning on sharing this so I didn't care that the numbers were out of order so I hope it doesn't bother you either :)

Here is what it looks like all mixed with the rest of January's stickers to make last May into this January... May had the same days and dates so it worked out nicely. I am not showing every page but this gives you an idea...


Hope you enjoy!

Love.

Who needs a little thread in their stocking?

Wednesday, December 19, 2018
Hi Everyone,

Gütermann thread makes Signiture Cotton Quilting Thread and they asked me to tell you about this pretty little box of thread that is available for a special price, 20% off, for the holidays at Joann stores.

It is twelve 700 yard spools. Signature cotton thread is 40 weight, 100% extra long staple, 3-ply mercerized Egyptian cotton. This gives it strength and softness with low lint.

I am not getting paid to post about it but they did give me a sweet little 6 pack box of the same thread in all the best neutral colors to give away to you.

So if you would like to win this box of thread. Please leave a comment below telling me what your favorite color of thread is and why. I will draw a winner next Thursday from the comments.

I will start... my favorite color is dove grey because it matches everything :)

Hope you are having a lovely Holiday Season.

Love,

New Quilter's Planner Stickers for January '19

Tuesday, December 18, 2018

Hey Everyone!

[Quilter's Planner link is an affiliate link. No extra cost to you just helps me pay for sticker paper :)] 

Can't believe I started this a year ago. Have you gotten your new Quilter's Planner yet? It is about time to start planning for next year. I missed a couple months of making stickers while I was dealing with health stuff but it  was never far from my mind. I hope you like blue and aqua and stark contrasts ... and I apologize to the southern hemisphere but January is all about the Winter. I do have sunny summer /spring stickers available on the sticker page though so at least you can sub those in right about now.

Free Stickers to Use in your Quilter's Planner to beautify and help you get the most out this useful tool. Click through to grab it.


Here are pre-view pics of the sheets in this months kit...

Free Stickers to Use in your Quilter's Planner to beautify and help you get the most out this useful tool. Click through to grab it.

Free Stickers to Use in your Quilter's Planner to beautify and help you get the most out this useful tool. Click through to grab it.

Free Stickers to Use in your Quilter's Planner to beautify and help you get the most out this useful tool. Click through to grab it.

This month I added a bonus page I did sweet little ladies with pet foxes in lots of diverse colors as well as some fun playful stickers for decorating. I hope you find one that you love.
Free Stickers to Use in your Quilter's Planner to beautify and help you get the most out this useful tool. Click through to grab it.

I have a giveaway for you tomorrow so stay tuned.

Love,

12 Days of Cricut

Monday, December 3, 2018
Hey Everyone,

Public Service Announcement. Cricut is having 12 Days of Sales including up to 80% off all of their new materials. It is pretty awesome. I used the Bejeweled Sampler Iron on Foil for my ornaments I shared a few weeks ago. You can find the sale here(affiliate link)


New Quilter's Planner Stickers for December

Saturday, November 24, 2018
Hi Everyone,

I made new fun stickers for December. If you prefer non Christmas stickers you can use the Winter Stickers from January of this year. This time I made day changer stickers too, for those of use that prefer Monday starts on the week (my personal favorite) as well. These stickers will cover the day labels in the planner. I made every color of the rainbow and you can reprint your favorites :) Here is the link to download the zip file with all of the files in it. I have made two versions of two of the pages so you can pick your favorite girls...


Hope you love them!


Love,

Easy Christmas gifts with the EasyPress 2

Tuesday, November 20, 2018
Hey Everyone,

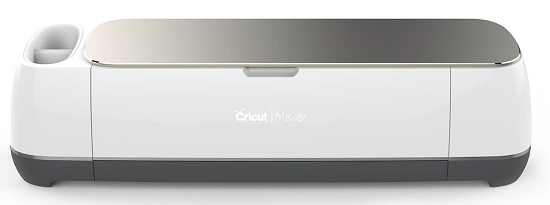
I know I have been talking a lot about my Cricut machines lately but I am always surprised how much I use them. I have so many new ideas for projects to use them with.... you all may not believe it but I do not cut quilt blocks with my rotary cutter at all anymore. Right now (since I had abdominal surgery 5 weeks ago) I can't even use my rotary cutter at all because my cutting table hits right at one of my incision points. (links in this post may be affiliate links) So my Maker (it i on sale right now) is my best friend right now. Here are my machines!


Cricut's new EasyPress 2 has been my favorite toy lately. It is 20%-30% off right now It is so amazing for making so many different things.I have the original EasyPress as well but there are some significant upgrades with the EasyPress 2. It heats up faster and has a thicker ceramic plate so the heat is more even all over the device which makes the iron-on material stick more consistently. It also gets hotter which allows it to support pressing onto a lot of new materials. My original was the original single size of 9" by 9" but the EP2 has two new sizes (in addition to the original size) that I actually use much more than I did the original size, 6" by 7" and 10" by 12".

Here are a couple projects that I used the tiny one on...

Cute Christmas Ornaments/Pincushions

My own design T-shirt

Another T-shirt I designed

I painted this then applied the white portions in Iron-on
The tiny EasyPress 2 was perfect for the ornaments and the little art canvas (it would be perfect for baby onsies too).  I really could have used the Biggy EasyPress 2 for the t-shirts. I had to press multiple times to cover the large designs but with the big one I will be able to do the whole designs at once when I do them again. I have plans for a fun banner/flag for winter that will be great to use the big one on as well.

I love the Raspberry color and it goes nicely with the new Rose colored Maker too :) 


And just a word about the EasyPress Mats they are so perfect for using on my craft surface (cutting mat) they are 5 layers of protection against the heat and they are soft and mobile so I can throw them on a shelf when I don't need them or put them on my cutting table for a perfect place to press with the EasyPress or my Iron. These are on sale half price right now and they are great portable ironing mats.

This is a sponsored conversation written by me on behalf of Cricut. The opinions and text are all mine.

Comments submitted may be displayed on other websites owned by the sponsoring brand.

I would not volunteer to talk about these machines so much if I didn't really love them and really use them.

Hope you have a great Holiday weekend!

Love,

Beginnings Quilt Along Rows and Borders

Tuesday, October 30, 2018
Hi Everyone,

Here it is the final post in the QAL. I told you we would have the top done before the end of October :)

I am just going to dive right in here:

The Beginnings QAL


Rows and Borders (Final size 44” by 52”)

Printable PDF

Cut (after your rows are sewn together):

2 - 2 ½” by measurement of your quilt length approximately 40 ½” Inside Border fabric
2 - 2 ½ by measurement of your quilt width plus 4 ½” approximately 36½” Inside Border fabric
2 – 4 ½” by measurement of your quilt length plus borders plus ½” approximately 44 ½” Outside Border fabric (this might have to be pieced if your fabric isn’t at least 45” wide)
2 – 4 ½” by measurement of your quilt width plus borders plus ½” approximately 44 ½” Outside Border fabric (this might have to be pieced if your fabric isn’t at least 45” wide)
** all seams are ¼”


Instructions:


1. Sew your blocks together into rows matching and pinning any seams that occur at the same place. As shown by the red arrow. Do the same on the second row.  Press the top row to the right and the second row to the left.


2. Sew your rows together matching and pinning any seams that occur at the same place. As shown by the red arrows.


3. Repeat steps 1 and 2 for the bottom two rows


4. Sew the rows together by first finding the center of the 9-Patch and Friendship star row and pinning it to the center of the top two rows unit. Then pin each end. Then pin half way between the ends and the center and keeping working halfway inbetween each pin until you feel confident that you have enough pins to keep it stable. Sew the seam. Then repeat for the bottom two row unit and the bottom of the 9-patch/ star row. I have placed numbers where the pins should go. Pin in this order.


5. Measure the long sides of your quilt and average the number if they are different. (In other words if one side is 39” and the other is 40” then your meaurement should be 39 ½”)  Trim two of your 2 ½” strips of inner border fabric to that measurement. Pin the same way you did for the rows. One in the center then the two ends then half way in between. This will keep you from having wavy borders. Sew both side borders on


6. Measure the width of the quilt on the top and bottom, with the two side borders and average again. Trim the last two 2 ½ strips of inside border fabric to the length you averaged. And pin and sew.


7. Repeat step 5 for the outer side borders.


8. Repeat Step 6 for the outer top and bottom borders. Then you are done !!

Yay! We are done! You might want to take your quilt to a professional to have it quilted. If you want to do it yourself there are a lot of resources out there. Books by Angela Walters and she also has videos on Bluprint.


I hope you loved the quilt along!


Love,

Beginnings Quilt Along Block 15

Friday, October 26, 2018
Hi Everyone,

How about this... the last block already! So you have two to work on this weekend.

If you are using the Maker to cut your blocks here is the file.

The Beginnings QAL (Printable PDF)


Block 15 House (8” Finished)

For One Block (that is what you need for the quilt)

Cut:

2 –  2 ½”” Squares of Background Fabric
4 –  2 ½”  by 2” Rectangles of Background Fabric
1 –  2 ½”  by 8 ½” Rectangle of Roof Fabric
1- 2 ½” by 3 Rectangle of Door Fabric
1 – 8 ½: by 2” Rectangle of House Fabric (A)
1- 2 ½” Square of House Fabric (B)
2- 2” by 1 ½” Rectangles of House Fabric (C)
2- 1 ½” by 3 ½” Rectangles of House Fabric (D)
4- 2” by 1” Rectangles of House Fabric (E)
2- 3 ½” by 1” Rectangles of House Fabric (F)
** all seams are ¼”

Instructions:


1. Mark the back of the 2 1/2” squares of background fabric with a diagonal line.


2. Sew Directly on the line and trim the corners. Press toward the roof.


3. Lay out The cut pieces so that it is easier to see how the block goes together. Here is a Diagram with the Pieces labeled to make it easier for you.

4. Sew the C and window pieces together. Then sew them to the D pieces.


5. Sew the D pieces to the window pieces. Then to the F pieces.

6. Sew the resulting sections from Step 4 and 5 together. Then sew the door and piece B together.


7. Sew the three sections together to make the lower part of the house.


8. Sew Piece A to the Roof (be sure to find the center of each of the pieces and pin at the center and each end before you sew). Then sew the Roof Section to the lower section and you are done.


Nest week I will have the final putting the top together post. We are almost done!

Have an amazing weekend!!

Love,


Beginnings Quilt Along Block 14

Thursday, October 25, 2018
Hi Everyone,

Here is our second to last block. I love this Bowtie Block and I want to make an entire quilt out of it soon. I hope you love it too.

If you have been using the Maker to cut your blocks then some of this block is cut already, but... I did change the size of the small pieces so you will want to re-cut the small squares at least.

If you are using the Maker to cut your blocks here is the file.

The Beginnings QAL (Printable PDF)


Block 14 Bowtie (8” Finished)

For One Block (that is what you need for the quilt)

Cut:
8 –  2 ½”” Squares of Background Fabric
8 –  2 ½”  Squares of Focus Fabrics in sets of 2
8 –  1 ½”  Squares of Focus Fabrics in sets of 2


** all seams are ¼”

Instructions:

1. Mark the back of the 1 1/2” squares with a diagonal line.


2. Match the corner of a 1 ½” square with one corner of a background 2 ½” square and sew directly on the diagonal line. Trim away the corner leaving a ¼ seam allowance. And press toward the focus fabric. Repeat for all of the background pieces.


3. Lay out the matching focus fabric squares with the prepared background squares as a four patch and sew the two rows together. Press the top row to the right and the bottom row to the left.

4. Match the center seam and pin. Sew the seam to create the individual Bowtie blocks.


5. Lay out the individual blocks so that they form a circle as shown.


6. Match up your seams so that they nestle and sew the two rows together. Press the top row to the right and the bottom row to the left.


7. Sew your two rows together.


8. And you are done.

I hope you love it as much as I do.

Have an Amazing weekend!

Love,

Custom Post Signature

Custom Post  Signature